-- This script was generated by the ERD tool in pgAdmin 4.
-- Please log an issue at https://github.com/pgadmin-org/pgadmin4/issues/new/choose if you find any bugs, including reproduction steps.
BEGIN;


CREATE TABLE IF NOT EXISTS public.departments
(
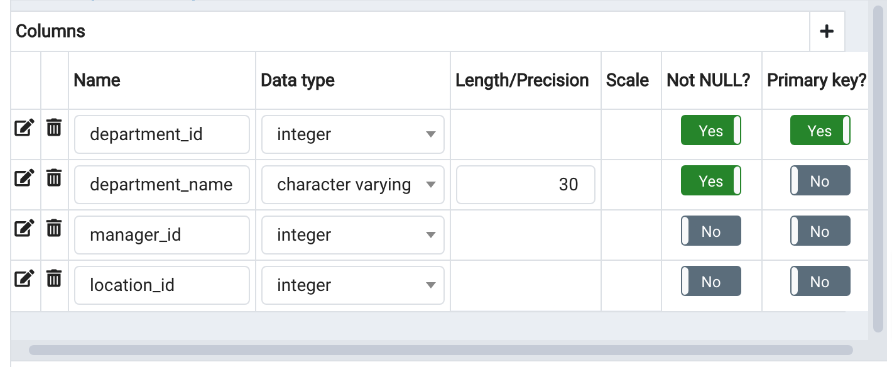
    department_id integer NOT NULL,
    department_name character varying(30) COLLATE pg_catalog."default" NOT NULL,
    manager_id integer,
    location_id integer,
    PRIMARY KEY (department_id)
);

CREATE TABLE IF NOT EXISTS public.employees
(
    employee_id integer NOT NULL,
    first_name character varying(20) COLLATE pg_catalog."default",
    last_name character varying(25) COLLATE pg_catalog."default" NOT NULL,
    email character varying(100) COLLATE pg_catalog."default" NOT NULL,
    phone_number character varying(20) COLLATE pg_catalog."default",
    hire_date date NOT NULL,
    job_id character varying(10) COLLATE pg_catalog."default" NOT NULL,
    salary numeric(8, 2) NOT NULL,
    commission_pct numeric(2, 2),
    manager_id integer,
    department_id integer,
    PRIMARY KEY (employee_id)
);

CREATE TABLE IF NOT EXISTS public.jobs
(
    job_id character varying(10) COLLATE pg_catalog."default" NOT NULL,
    job_title character varying(35) COLLATE pg_catalog."default" NOT NULL,
    min_salary numeric(8, 2),
    max_salary numeric(8, 2),
    CONSTRAINT jobs_pkey PRIMARY KEY (job_id)
);

CREATE TABLE IF NOT EXISTS public.locations
(
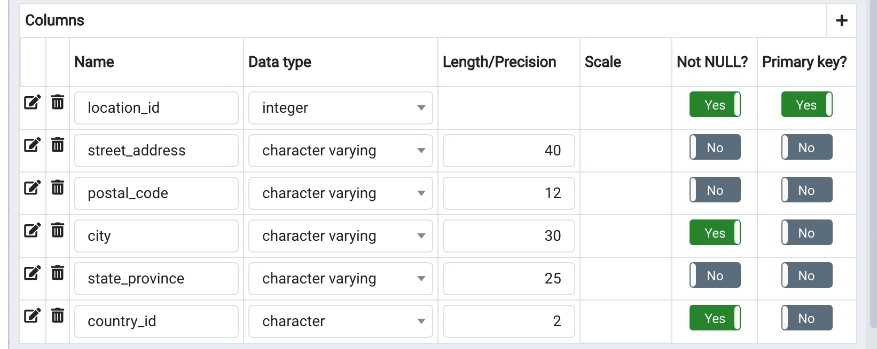
    location_id integer NOT NULL,
    street_address character varying(40) COLLATE pg_catalog."default",
    postal_code character varying(12) COLLATE pg_catalog."default",
    city character varying(30) COLLATE pg_catalog."default" NOT NULL,
    state_province character varying(25) COLLATE pg_catalog."default",
    country_id character(2) COLLATE pg_catalog."default" NOT NULL,
    CONSTRAINT locations_pkey PRIMARY KEY (location_id)
);

ALTER TABLE IF EXISTS public.departments
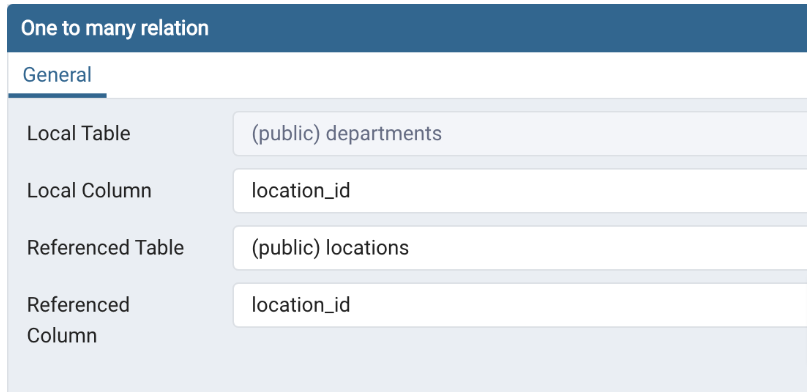
    ADD FOREIGN KEY (location_id)
    REFERENCES public.locations (location_id) MATCH SIMPLE
    ON UPDATE NO ACTION
    ON DELETE NO ACTION
    NOT VALID;


ALTER TABLE IF EXISTS public.departments
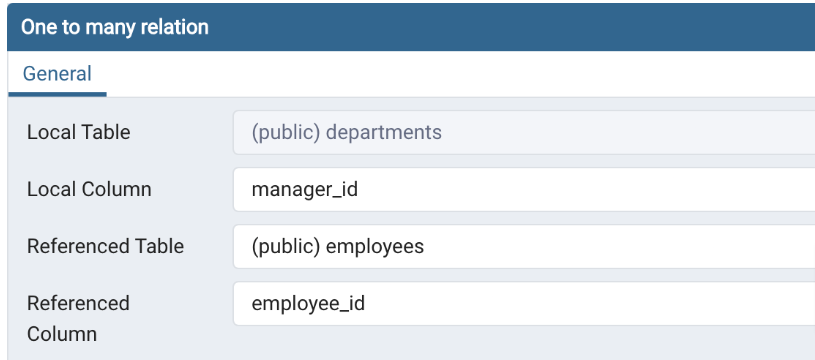
    ADD FOREIGN KEY (manager_id)
    REFERENCES public.employees (employee_id) MATCH SIMPLE
    ON UPDATE NO ACTION
    ON DELETE NO ACTION
    NOT VALID;


ALTER TABLE IF EXISTS public.employees
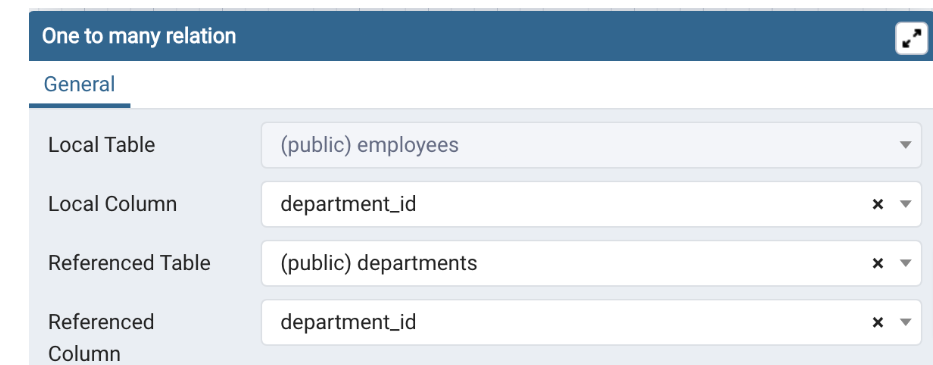
    ADD FOREIGN KEY (department_id)
    REFERENCES public.departments (department_id) MATCH SIMPLE
    ON UPDATE NO ACTION
    ON DELETE NO ACTION
    NOT VALID;


ALTER TABLE IF EXISTS public.employees
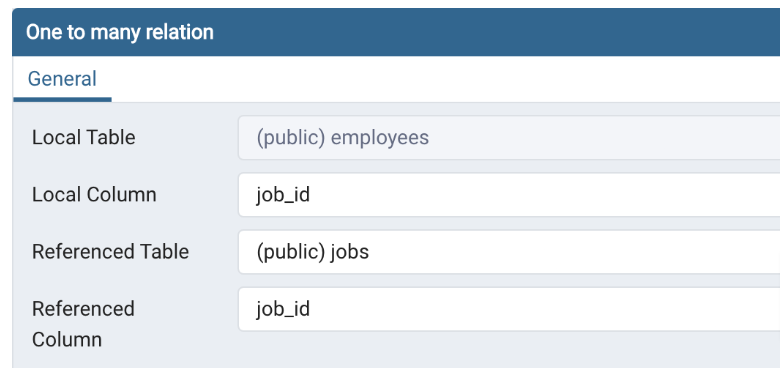
    ADD FOREIGN KEY (job_id)
    REFERENCES public.jobs (job_id) MATCH SIMPLE
    ON UPDATE NO ACTION
    ON DELETE NO ACTION
    NOT VALID;

END;ERD Designer
Best Practices
To ensure optimal performance, data integrity, and flexibility, developers must adhere to best practices when designing RDBMS schemas.
Understand Business Requirements
Before diving into database design, you should understand the business requirements and data needs of the application. This involves collaborating closely with stakeholders to identify entities, relationships, and data constraints. A clear understanding of the business domain helps in crafting a database schema that accurately represents the underlying data.
Example: Consider a hypothetical e-commerce platform as an example. In this scenario, the business requirements may include managing customer information, product catalog, orders, and transactions.
Normalize Data to Reduce Redundancy
Normalization reduces data redundancy and improves data integrity. By organizing data into separate tables and eliminating redundant information, normalization minimizes the risk of errors when updating, inserting, or deleting data. Adhering to normal forms, such as 1NF, 2NF, and 3NF, ensures a logically structured schema and maintains data consistency.
Example: Consider a customer placing multiple orders. Instead of storing customer information (such as name and address) with each order, you can normalize the data by creating separate tables for Customers and Orders. This approach minimizes redundant data and ensures updates to customer information across all of their associated orders.
Denormalize for Performance Optimization
While normalization protects data integrity, sometimes denormalization can benefit performance. Denormalization involves adding redundant data or aggregating data from multiple tables to improve query performance. However, use denormalization with caution, as it can lead to data duplication and potential inconsistencies. Strike a balance between normalization and denormalization based on the specific performance requirements of the application.
Example: Consider a reporting dashboard that frequently retrieves aggregated sales data by region. Instead of joining multiple tables each time a report is generated, you can denormalize the data by pre-calculating and storing aggregated sales figures by region. This approach improves complex analytical query performance.
Establish Foreign Key Relationships
Establishing relationships between tables using foreign keys maintains data integrity and enforces referential integrity constraints. Foreign keys ensure that each record in a child table corresponds to a valid record in the parent table, preventing orphaned or dangling records. To maintain data consistency across related tables, take care to define cascading actions, such as CASCADE DELETE or CASCADE UPDATE.
Example: Let’s revisit and extend the e-commerce example. A foreign key constraint on the CustomerID column in the Orders table can establish a relationship between the Orders table and the Customers table. This ensures an association between each order with a valid customer record, preventing orphaned orders.
Indexing for Query Performance
Effective indexing optimizes query performance by facilitating faster data retrieval. Identify commonly queried columns and create indexes on those columns to speed up search operations. However, excessive indexing can lead to storage and maintenance overhead. Regularly monitor and fine-tune indexes to ensure they align with query patterns and workload demands.
Example: Continuing with the e-commerce example, suppose customers frequently search for products by their name or category. By creating indexes on the ProductName and Category columns in the Products table, you can significantly improve the speed of search operations. Indexes enable the database engine to locate relevant rows quickly, reducing query execution time.
Partitioning for Scalability
Partitioning involves dividing large tables into smaller, more manageable chunks based on defined criteria such as a range, a list, or a hash. Partitioning improves query performance, manageability, and availability, especially in environments with massive datasets. By distributing data across multiple storage devices or servers, partitioning enables horizontal scalability and facilitates parallel query processing.
Example: Imagine that your e-commerce platform experiences rapid growth, resulting in a massive Orders table. You can distribute the data across multiple storage devices or servers by partitioning the Orders table based on the order date range (e.g., monthly partitions). This approach improves query performance and facilitates horizontal scalability as the dataset grows.
Optimize Data Types and Constraints
Choosing appropriate data types and constraints for database columns promotes efficient storage utilization and data validation. To minimize storage overhead, use the smallest data type that can accommodate the range of values for a column. Additionally, enforce constraints such as NOT NULL, UNIQUE, and CHECK to maintain data integrity and prevent invalid data entry.
Example: In the e-commerce example, the Quantity column in the OrderDetails table should use an integer data type to represent whole numbers. Additionally, enforce constraints such as ensuring the Quantity value is always greater than zero using a CHECK constraint. These measures help maintain data integrity and prevent invalid data entry.
Plan for Data Growth and Maintenance
Anticipate future data growth and plan the database schema accordingly to accommodate scaling. Implement robust backup and recovery strategies to safeguard against data loss and ensure business continuity. Regularly monitor database performance, analyze query execution plans, and conduct performance tuning exercises to optimize resource utilization and maintain responsiveness.
Example: In an e-commerce scenario, you may need to regularly archive historical orders to manage database size and optimize performance. Implementing a data archiving strategy helps mitigate the impact of data growth on query performance and storage resources. Regular maintenance tasks such as index rebuilds and statistics updates are also essential for optimal database performance.
ERD
What follows is an example of how to
- Create an ERD of a database
- Generate and execute an SQL script from an ERD to create a schema
- Load the database schema with data
ERD Designer can create entity relationship diagrams. pgAdmin includes the ERD tool where you can design your ERD and then generate an SQL script to create your database and objects based on your design.
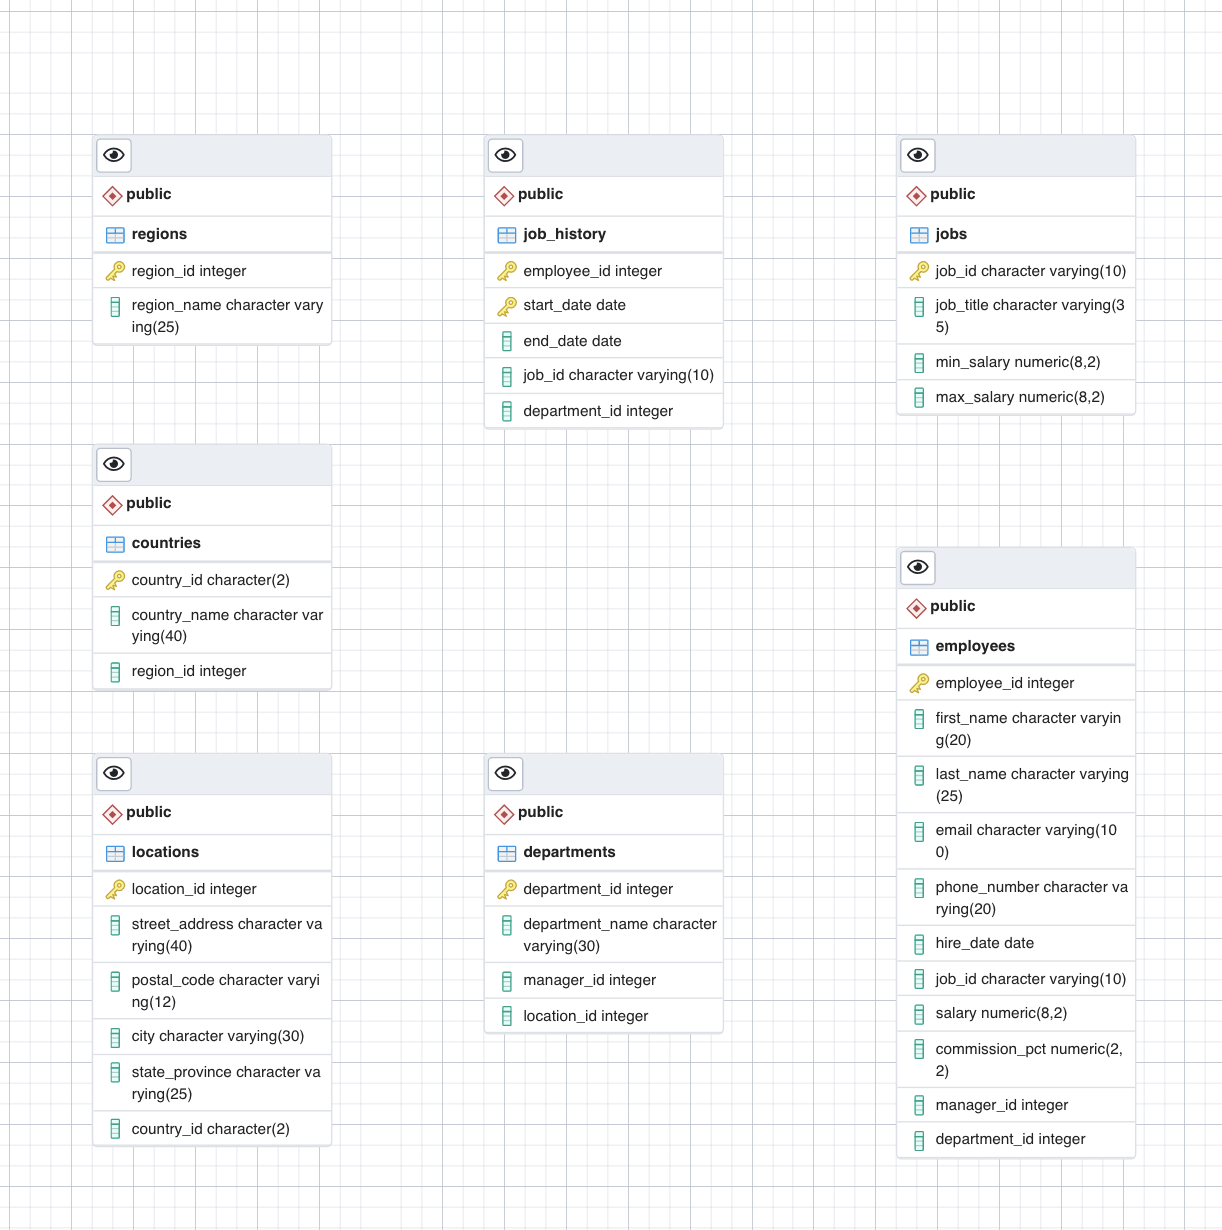
The db comes from here: HR Sample Db- Copyright Oracle Corporation. Here is an overview of the tables in the HR db
- Create or Start your PostgreSQL instance
- Note the password: gHQPQTW5DdfqlIqSVzPL57Zw
- Proceed to your pgAdmin home page
Create HR db
- In the tree-view, expand Servers > postgres > Databases
- Enter your PostgreSQL service session password if prompted during the process
- Right-click on Databases and go to Create > Database
- Type HR as the name of the database and click Save.
Create ERD
- In the tree-view, expand HR
- Right-click on HR and select ERD For Database
Add Table employees to ERD
- Click + box in the Tab Menu
- Add table
- On the General tab, in the Name box, type employees as the name of the table
- Don’t click OK, proceed to the next step
Setup Cols in Table
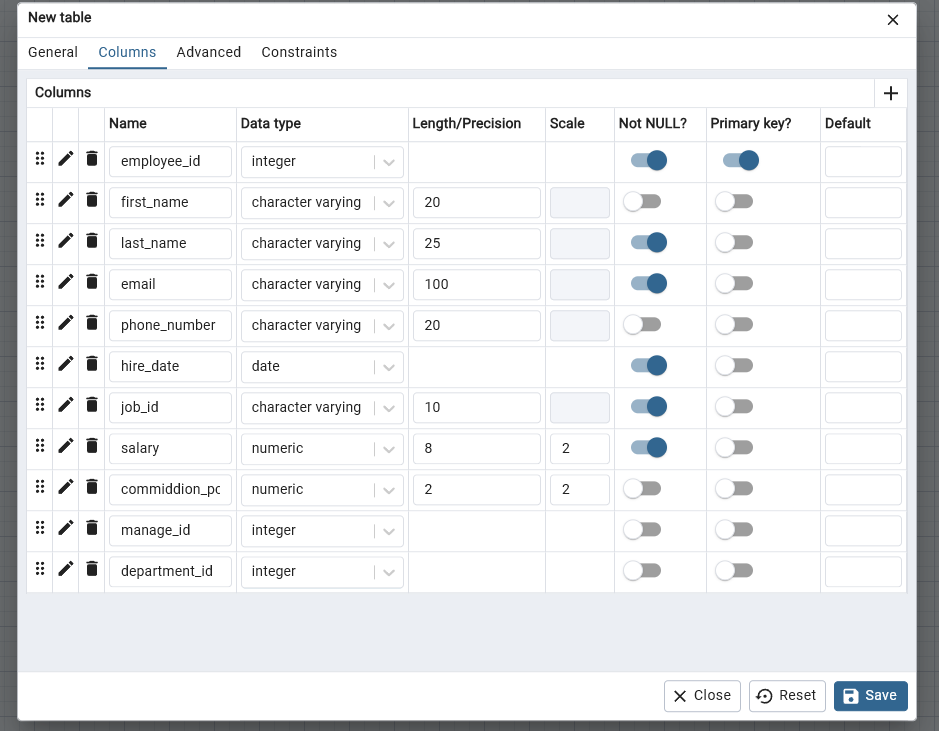
- Switch to the Columns tab
- Click Add new row to add the necessary column placeholders.
- Now enter the employees table definition information as shown in the image below to create its entity diagram
- Click OK.
Add Table jobs ERD
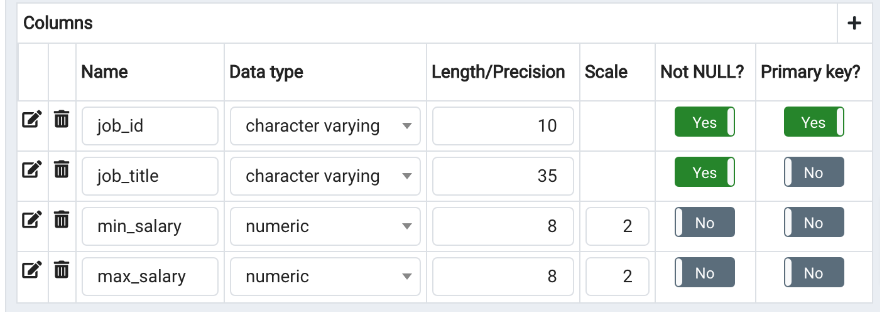
- Repeat the above table process for jobs
- Here are the columns
Add Table departments ERD
Add Table locations ERD
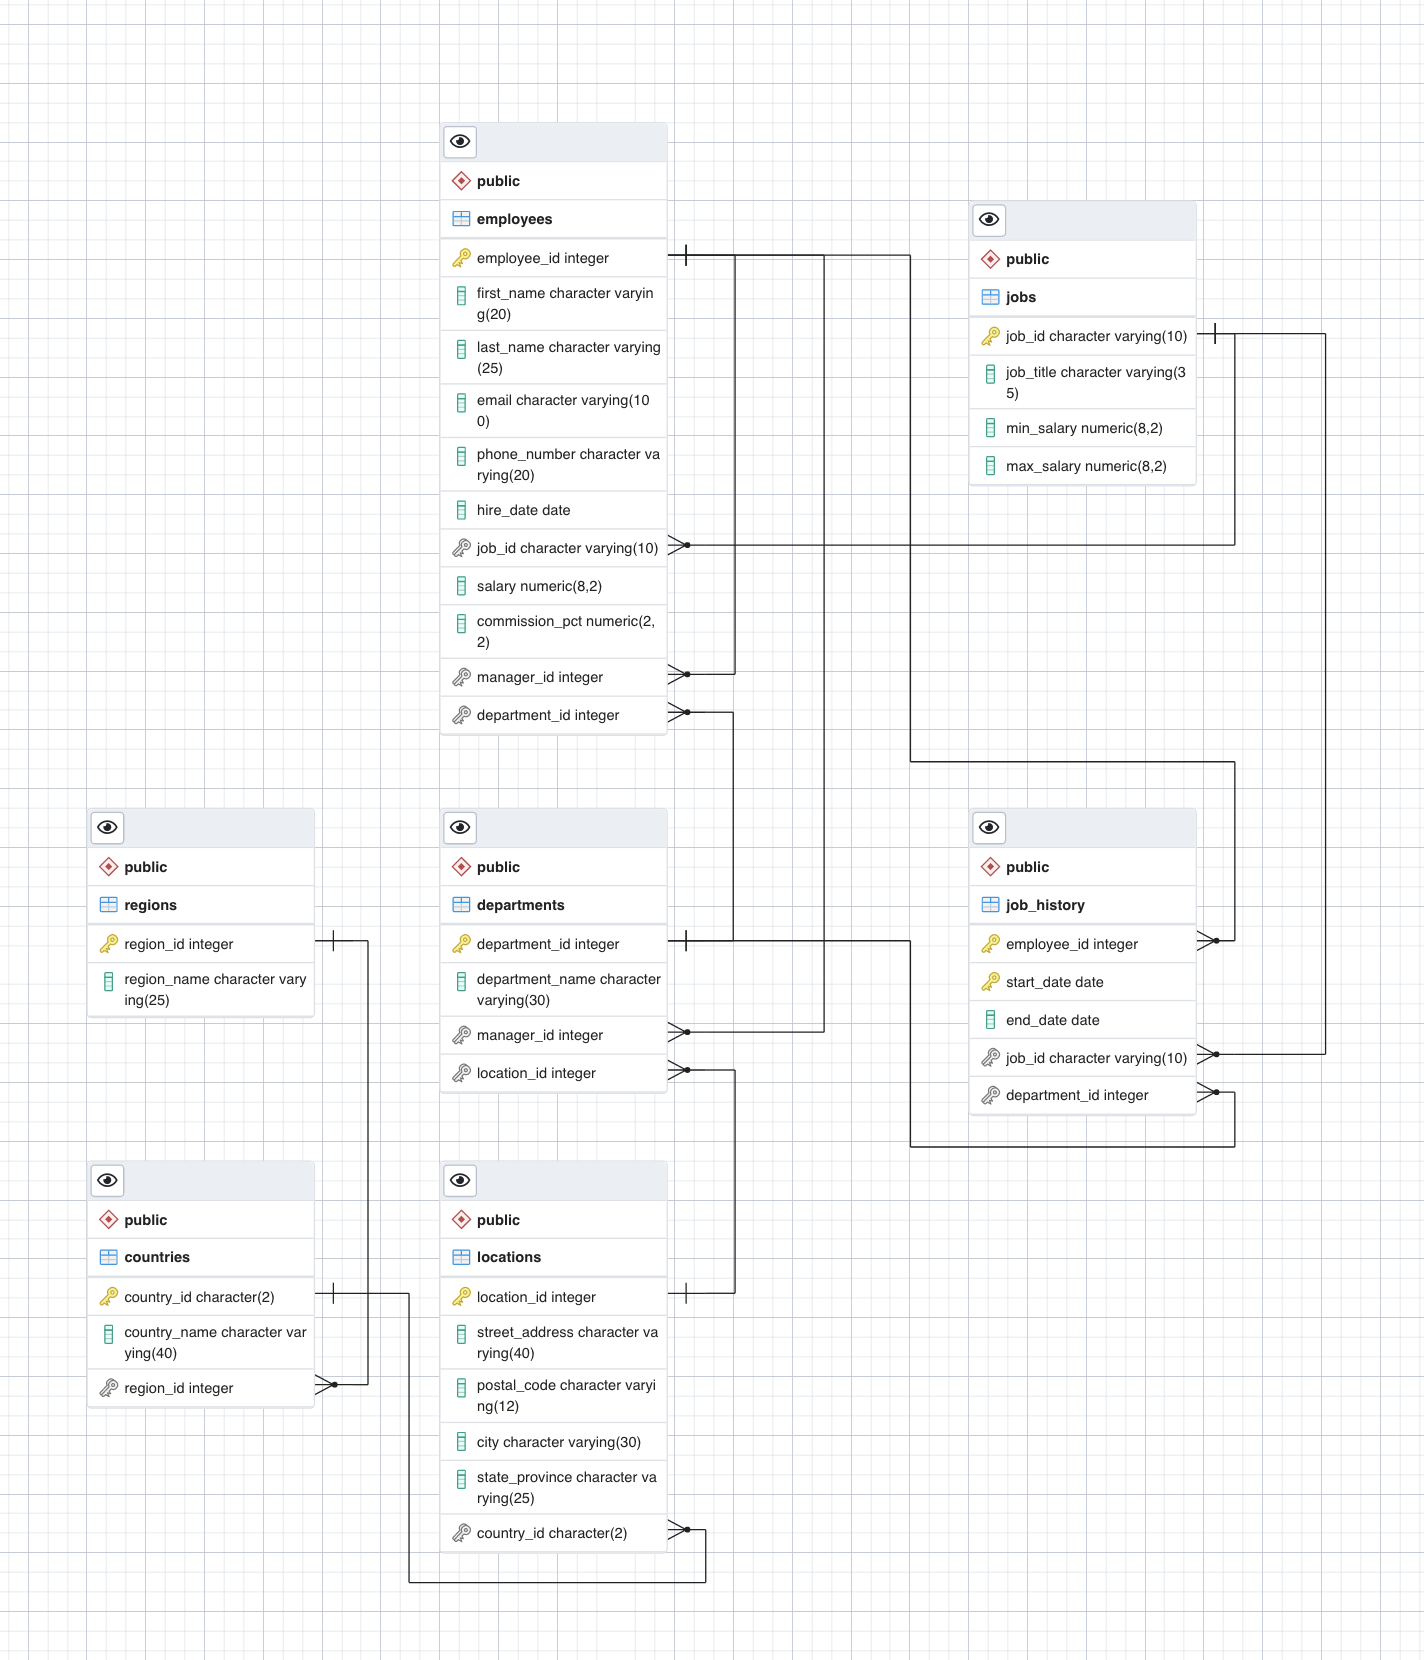
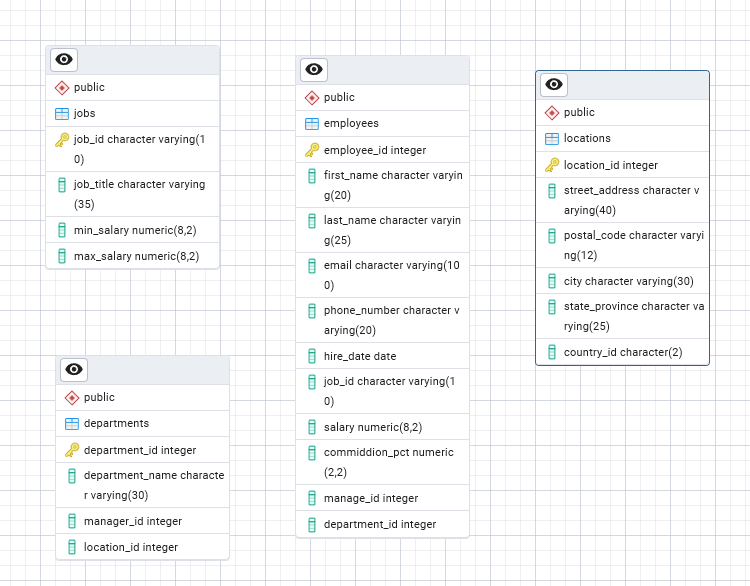
Now we have the ERD for all the tables
Relationships
Now we’ll create relationships between the entities by adding foreign keys to the tables.
Employees > Departments
- Select the entity diagram employees and click One-to-Many link
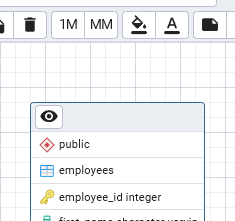
- Now enter the definition information for a foreign key on the employees table as shown in the image below to create the relationship
- Then click OK.
Emplyees > Jobs
Departments > Locations
Departments > Employees
Script ERD to Schema
Now we’ll generate and execute a SQL script from the ERD
- In the ERD view
- Click on Generate SQL icon
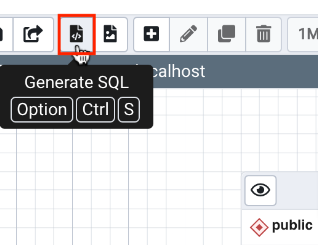
View SQL script
- Automatically a SQL pane opens displaying the script once you click on the button above
Execute Script
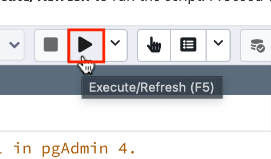
- You’ll see at the bottom right of the screen a green popup telling you the time it took to run the script (in milliseconds for this task)
So far we’ve created a database and then created the tables and set all the relationships between the tables. So we have created the schema for the db. Now we’ll
Load db Schema with Data
Here we will load the db schema we’ve just created with data using the pgAdmin Restore feature
- Download the HR_pgsql_dump_data_for_example-exercise.tar PostgreSQL dump file (containing the partial HR database data) using the link below to your local computer.
- HR tar location
- We will follow the same instructions we used in PostgreSQL page to Load Data with CSV File
Restore
Steps
- Left pane tree>click on HR (name of db)
- Restore
- General Tab> Format will be Custom or tar >from the … >Select File> var > lib > pgadmin >
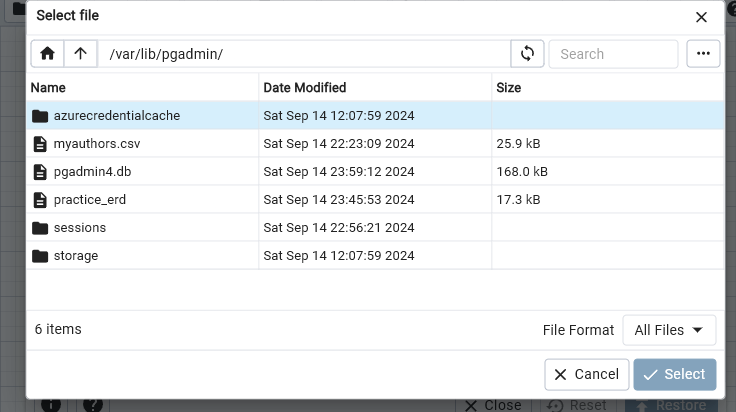
- Choose the … icon in upper right
- UPLOAD
- Drag file to window
- Once upload is complete, close window
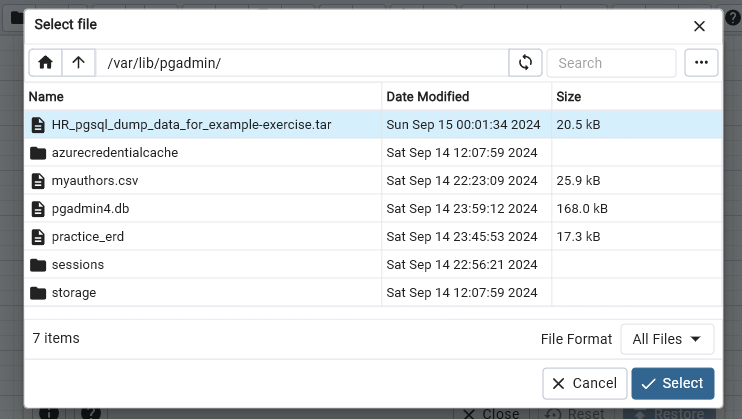
- Select the file just uploaded
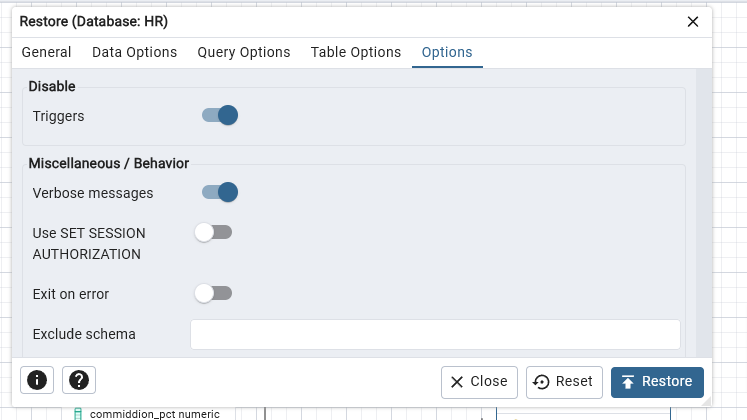
- From OPTIONS tab
- Disable > Trigger Click YES
- Click on RESTORE
Practice
In this practice exercise, first you will finish creating a partially complete ERD for the HR database. Next, you will generate and execute an SQL script to build the complete schema of the HR database from its ERD. Finally, you will load the complete database schema with data by using the Restore feature.
Download the HR_pgsql_ERD_for_practice-exercise.pgerd ERD file (containing a partial HR database ERD based on the one that you created in Task A of the Example Exercise) below to your local computer.
In pgAdmin, create a new database named HR_Complete.
Open the ERD Tool and use Load from file to load the HR_pgsql_ERD_for_practice-exercise.pgerd file downloaded in step 2 above
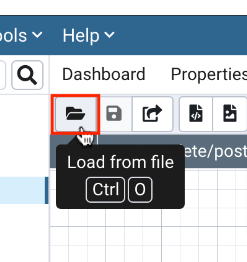
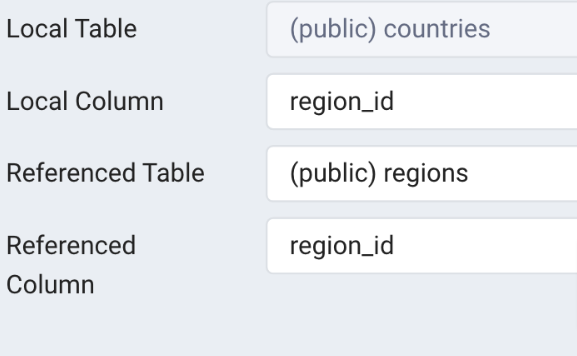
- You will see the previous four entity diagrams along with relationships that you created in the Example Exercise. You will also see three new entity diagrams for the job_history, regions, and countries tables and one new relationship within the entity diagram of the employees table between manager_id as local column and employee_id as referenced column.
Countries > Regions
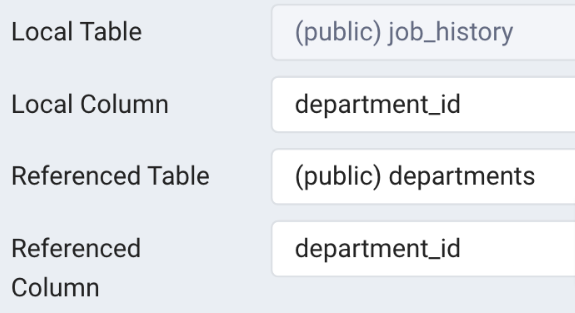
Job_history > departments
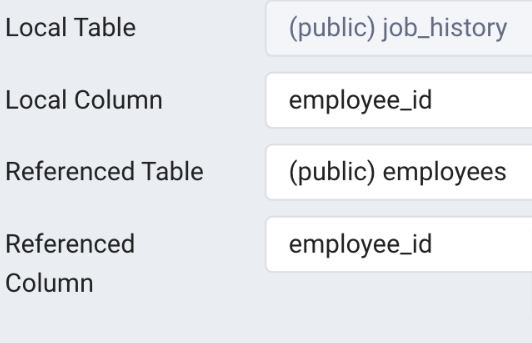
Job_history > employees
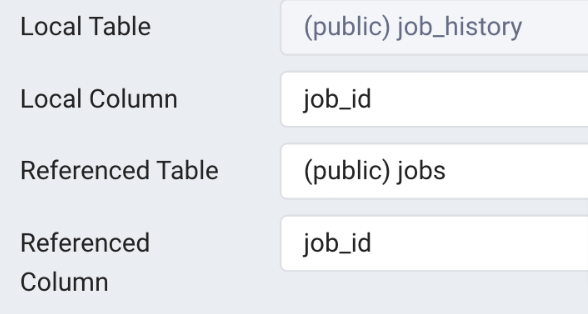
Job_history > jobs
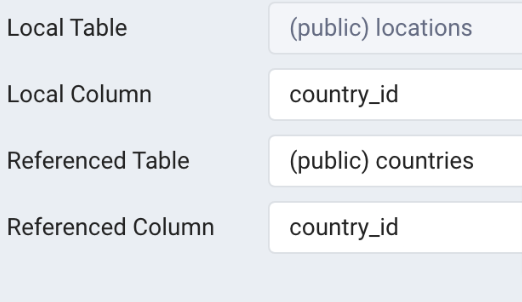
Locations > countries
ERD
Here is what the ERD will look like
