wget https://cf-courses-data.s3.us.cloud-object-storage.appdomain.cloud/IBM-DB0110EN-SkillsNetwork/datasets/sakila/sakila_pgsql_dump.sqlOpen PostgreSQL CLI
PostgreSQL
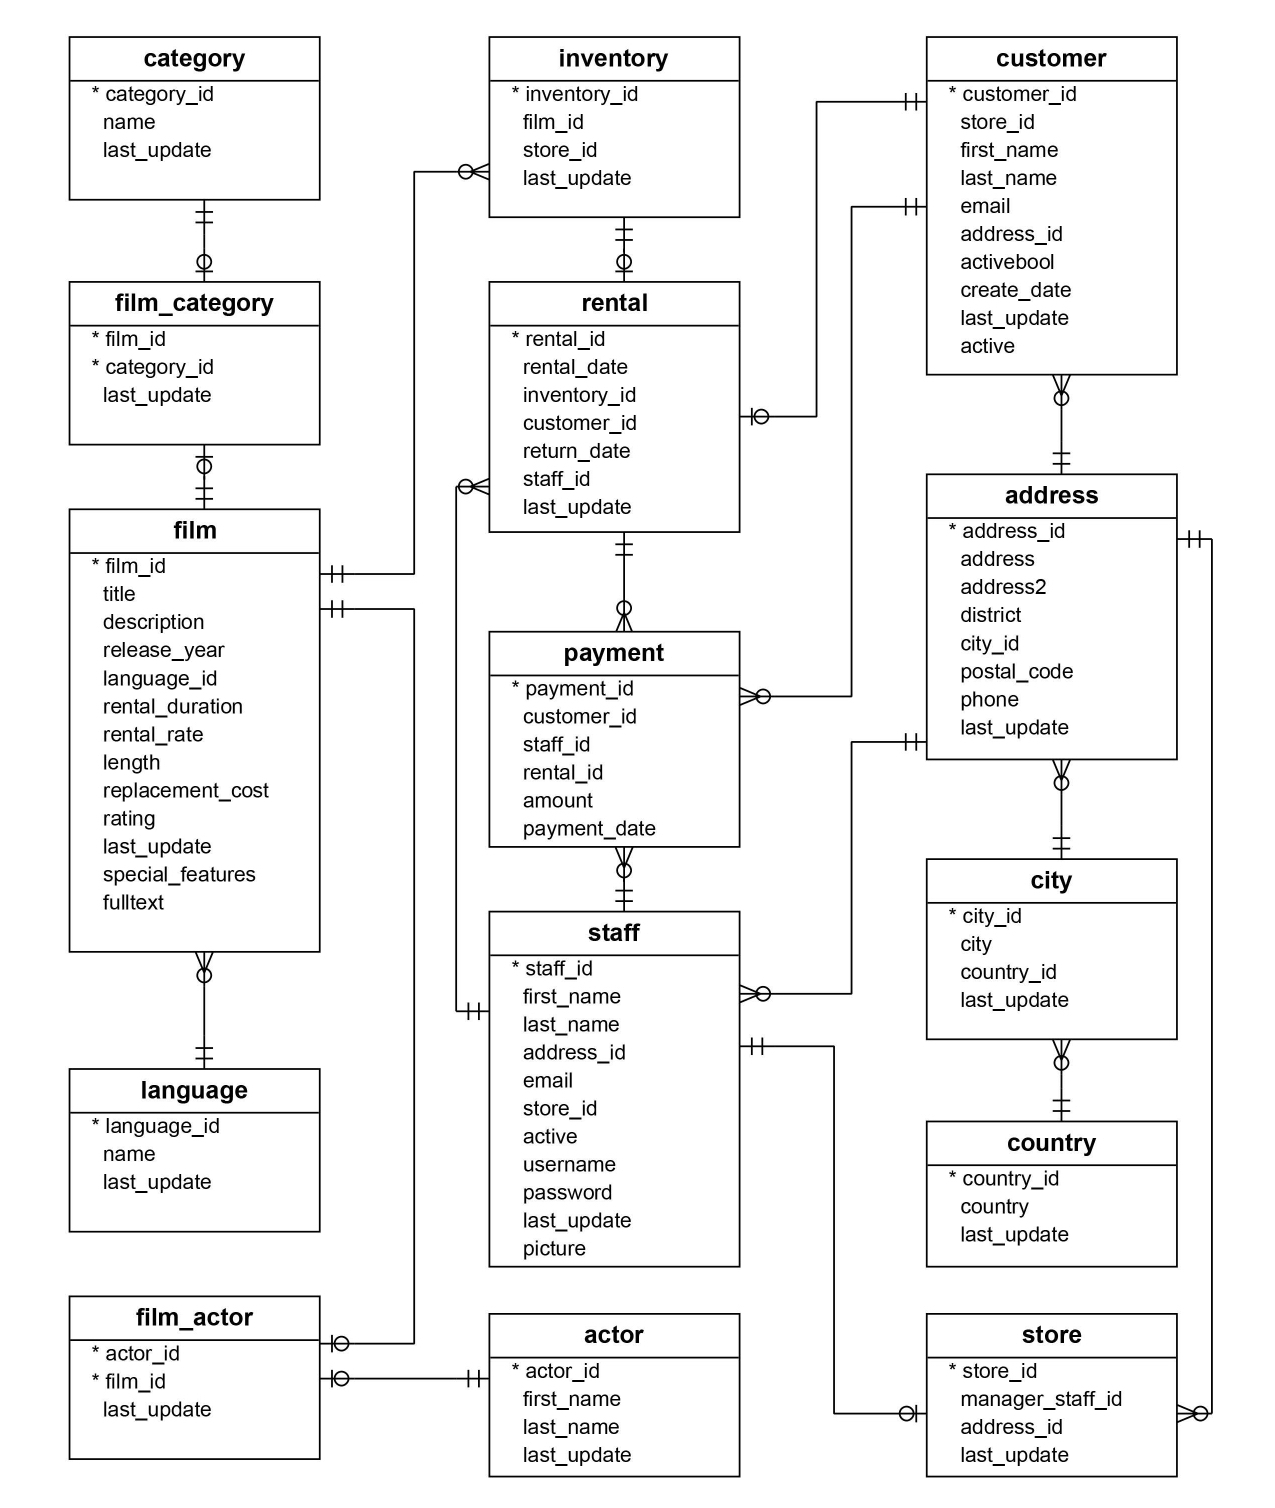
Documentation is found here on their site. In this example we’ll be using the same db we used when we setup MySQL. It will be the Sakila db which is found onthis page under New BSD License.
Here is the ERD to give you a general idea of the schema
CLI
From the Cloud IDE
- Create PostgreSQL db
- Pass: BZ76DSs9Sm0JhXZ9M1LtOJoY
- Open a new terminal
Download db Dump
- Click on PostgreSQL CLI button
- Prompt will change to postgres=#
Create new db sakila
- From within the postgres command prompt:
postgres=# create database sakila;
CREATE DATABASE
postgres=#
If you were outside the postgreSQL command prompt you’d use this to create the db from the dump
> createdb --username=postgres --host=postgres --password sakilaConnect to the Table
- Before we can load the data from the dump we need to connect to the table
postgres=# \connect sakila;
psql (14.13 (Ubuntu 14.13-0ubuntu0.22.04.1), server 13.2)
You are now connected to database "sakila" as user "postgres".
sakila=#
INCLUDE - Restore db from dump
- Now we can use the .sql file we downloaded to restore the db from dump
- Restore the sakila PostgreSQL dump file (containing the sakila database table definitions and data) to the newly created empty sakila database by using the following command in the terminal:
sakila=# \include sakila_pgsql_dump.sql;RESTORE - from Outside postgre prompt
# first you fetch the .tar version of the dump
> wget https://cf-courses-data.s3.us.cloud-object-storage.appdomain.cloud/IBM-DB0110EN-SkillsNetwork/datasets/sakila/sakila_pgsql_dump.tar

# use restore to restore the db to the new table
> pg_restore --username=postgres --host=postgres --password --dbname=sakila < sakila_pgsql_dump.tar
List All Tables
- Reconnect to the database first
- List all the tables
sakila=# \connect sakila;
psql (14.13 (Ubuntu 14.13-0ubuntu0.22.04.1), server 13.2)
You are now connected to database "sakila" as user "postgres".
sakila=# \dt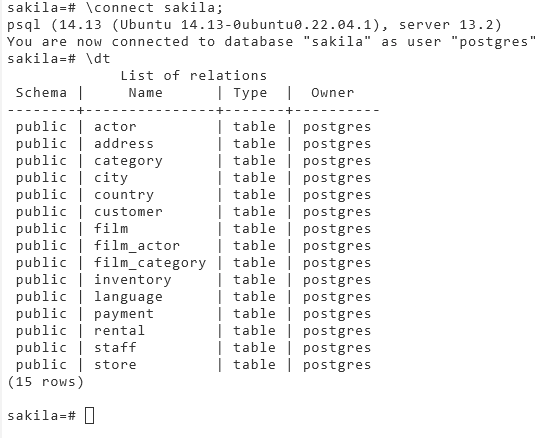
Explore Table
- Let’s explore the store table
- Just add it to the ommand
sakila=# \dt store;View all records
sakila=# SELECT * FROM store;Quit
sakila=# \qDump/Backup Tables
Finally, we can backup/dump the store table from the db. Use this command and enter the password
> pg_dump --username=postgres --host=postgres --password --dbname=sakila --table=store --format=plain > sakila_store_pgsql_dump.sqlDump in TAR format
We can back it up using non-text format .tar with this command
> pg_dump --username=postgres --host=postgres --password --dbname=sakila --table=store --format=tar > sakila_store_pgsql_dump.tarView the Dump File
> cat sakila_store_pgsql_dump.sqlpdAdmin
Once again we’ll use the same Books db we used in MySQL page:
- Open/Create a PostgreSQL instance depending on what you’re using and how you are using pgAdmin
- Now that you’re in pgAdmin
- “I am running version 8.10 of pdAdmin 4
- Get the password from the Connection Information Tab: gHQPQTW5DdfqlIqSVzPL57Zw
- In the left pane: Click on Servers
- PostgreSQL> Enter password
- Now you’re in the main page
- Left pane again> Expand Databases and you can clearly see the names of the dbs there
Create db
- Left pane
- Right click on Databases>Create>Database>
- Name: Books
- Save
- Now you can see the new db Books in the tree in left pane
Create Table
Now that you have your PostgreSQL service active and have created the Books database using pgAdmin, let’s create a few tables to populate the database and store the data that you wish to eventually upload into it.
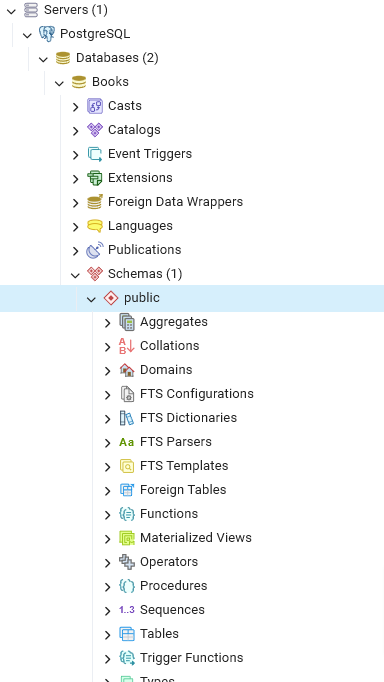
- In the tree-view, expand Books > Schemas > public. Right-click on Tables > Create > Table
- Name it: myauthors
- Click on the tab Columns and click the Add new row button four times to add 4 column placeholders.
- Don’t click Save, proceed to the next step.
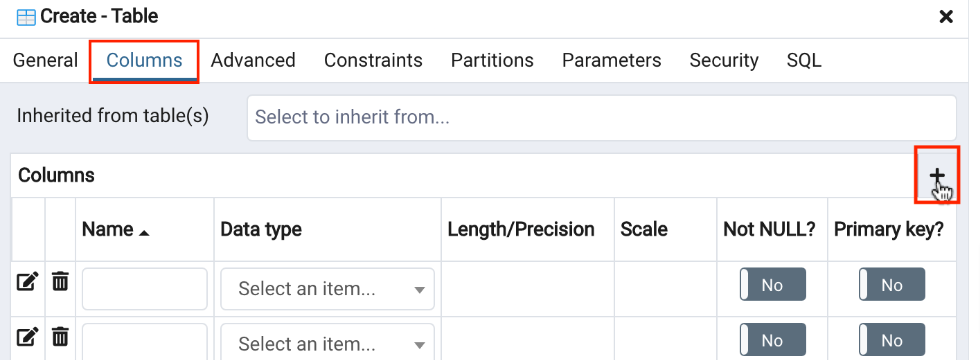
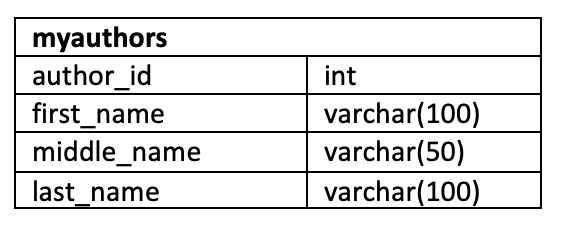
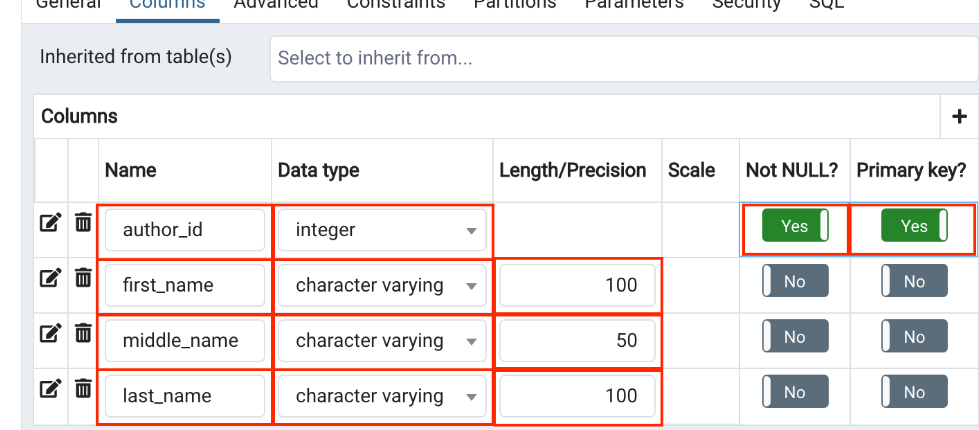
- Enter the myauthors table definition structure information as shown in the image below in the highlighted boxes. Then click Save.
- As you see above: we just created a primary key and set the constraint to NOT NULL as well
Load Data Manually
You now have a database and have created tables within it. With the pgAdmin GUI, you can insert values into the tables manually. This is useful if you have a few new entries you wish to add to the database. Let’s see how to do it.
In the tree-view, expand Tables. Right-click myauthors and go to View/Edit Data > All Rows.
You’ll see the SQL command that created the view in the upper pane

- In the lower panes you’ll first see the columns listed
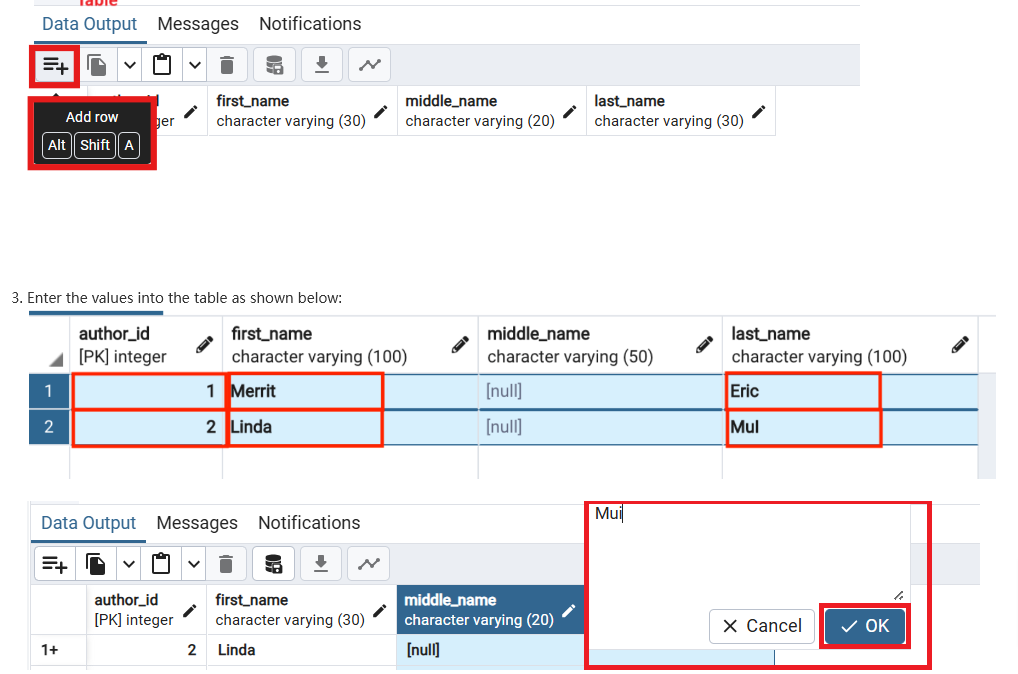
- Click on the left menu to add rows
- We want to insert 2 rows of data into the myauthors table
- In the lower Data Output pane, enter myauthors table data information for 2 rows as shown in the highlighted boxes in the image below
- Then click the Save Data Changes icon
Load Data with CSV File
An alternative is to load data into tables from a text or script file containing the data you wish to enter. Let’s take a look at how to do this.
- You will import the remainder of the myauthors table data from a csv text file. Download the csv file below to your local computer:
- In the tree-view, right-click on myauthors and go to Import/Export.
Follow these steps closely:
- Make sure Import/Export is set to Import,
- Format = csv.
- Then click Select file icon by the Filename box

Upload file
- Initially make sure the folder details empty and select the var option from the list as shown in the screenshot below
- Select var folder, then
- Select lib folder
- Select pgadmin folder
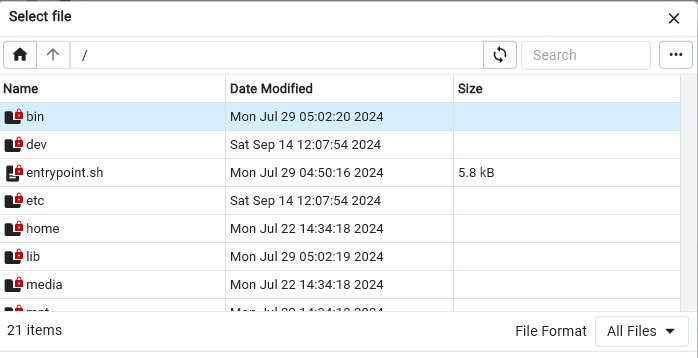
- Now select upload as mentioned here
- Drop the file from your computer
- And you’ll end up with this
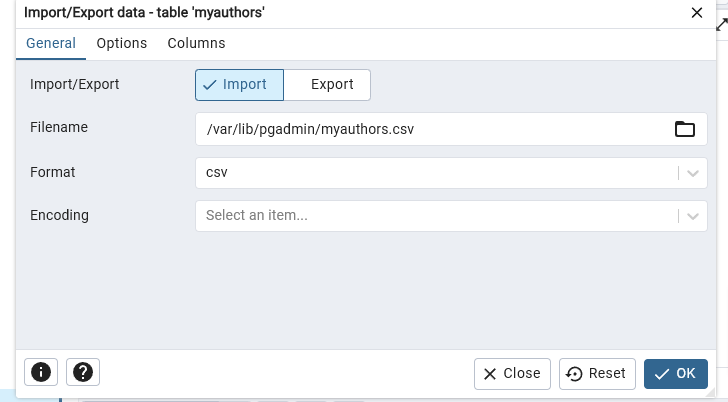
- Click on Options Tab > Enable Headers > OK
- You’ll be presented with a table showing the operation was successful
Review SQL
- Click on the SQL Tab and you’ll see the script that populated your db
-- Table: public.myauthors

-- DROP TABLE IF EXISTS public.myauthors;

CREATE TABLE IF NOT EXISTS public.myauthors
(
    author_id integer NOT NULL,
    first_name character varying(100) COLLATE pg_catalog."default",
    middle_name character varying(50) COLLATE pg_catalog."default",
    last_name character varying(100) COLLATE pg_catalog."default",
    CONSTRAINT myauthors_pkey PRIMARY KEY (author_id)
)

TABLESPACE pg_default;

ALTER TABLE IF EXISTS public.myauthors
    OWNER to postgres;
Review Table
- Let’s repeat the step above to view the new table
- From the left pane, right clisk on myauthors table>Edit>View All Rows